
How to Build a PC: A Beginner’s Step-by-Step Guide
Build your first desktop PC with a clear assembly order, compatibility checks, power-cable guidance and a practical first-boot checklist.
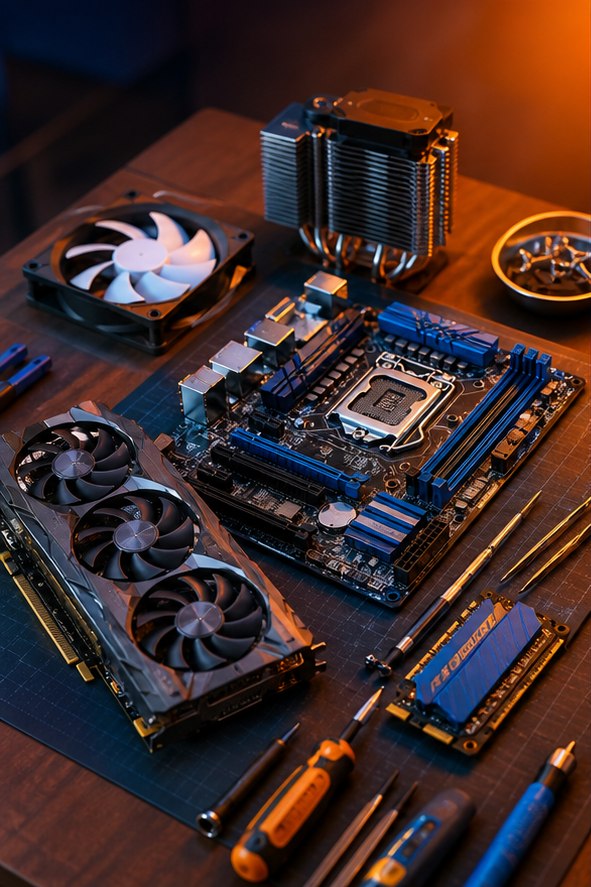
Your first PC build starts before you open a box. A successful build is a set of compatible parts, a clear workspace and a sequence of checks. This guide takes you from an empty case to a working desktop. It assumes a conventional desktop motherboard and case; your exact motherboard, cooler and case manuals take priority over any general guide.
1. Check the parts and prepare your workspace
Lay out the CPU, motherboard, memory, storage, power supply, case and CPU cooler. Add a graphics card if your work needs one or your CPU cannot provide graphics. Confirm the CPU appears on the motherboard’s support list, including its required BIOS version. Check the RAM generation, cooler mounting kit, graphics-card clearance and power connectors before opening sealed packaging.
Use a clean, dry, well-lit table, a suitable Phillips screwdriver and a tray for screws. Keep drinks away and avoid building on carpet. Handle boards by their edges and follow the component maker’s electrostatic-discharge precautions. Keep the power supply switched off and unplugged during assembly. Never open the power supply itself.
Download the manuals to your phone or another device. Prepare an operating-system installer on a spare USB drive; creating installation media erases that drive, so copy anything you need from it first. Include a monitor, keyboard and network connection in your setup plan.
2. Install the CPU, memory and M.2 storage
Place the motherboard on its cardboard box or a suitable nonconductive work surface. Open the socket mechanism as described in its manual. Align the CPU’s orientation marker with the socket marker and lower it into place without sliding it around or pressing on the contacts. Close the retention mechanism exactly as instructed. If the alignment is wrong, stop and check it.
Install a matched memory kit in the manual’s recommended slots. On many four-slot boards these are A2 and B2 for two modules, but verify your model. Align each module’s notch and press evenly until its retaining clips engage. DDR4 and DDR5 are physically different: a module that does not line up is not an invitation to push harder.
For an M.2 drive, identify a slot that supports its interface and length. Set the standoff or retention latch for the drive, insert it as the manual directs and secure it without bending the board. Remove protective film from the motherboard heatsink’s thermal pad if instructed; do not peel the SSD’s product label off.
3. Fit the cooler and prepare the case
Use the mounting hardware for your exact CPU socket. Check for a protective cover on the cooler’s contact surface. If thermal compound is already applied, do not add a second layer. Otherwise, use the compound amount and pattern recommended for that cooler and CPU. Tighten the mount gradually in the specified sequence and connect the cooler fan to CPU_FAN. Liquid coolers also need the pump and radiator-fan connections described in their manuals.
Remove the case panels and check the motherboard standoffs. Only install standoffs where the board has matching mounting holes; an extra one can contact the underside of the board. Fit a separate rear I/O shield before the motherboard if your board needs one. Some cases or large coolers require a different installation order, so check access before tightening everything.
4. Mount the motherboard, PSU and graphics card
Lower the motherboard onto the standoffs, align the rear ports and secure the screws until snug. Route the CPU power cable early if a top-mounted radiator will make it hard to reach later. Mount the power supply with its ventilation path unobstructed, following the case instructions. A downward-facing PSU fan needs a vent beneath it and enough clearance from the floor.
Connect the motherboard’s main 24-pin cable and the required CPU EPS power connectors. CPU EPS and GPU PCIe plugs are not interchangeable. Use only modular cables explicitly compatible with your exact PSU model; matching plug shapes do not prove that their wiring matches.
Install the graphics card in the recommended full-length PCIe slot, secure its rear bracket and fit a support if needed. Connect every required GPU power plug fully, following the card and PSU instructions for cable routing and bend clearance. SATA drives need both a data cable to the motherboard and power from the PSU.
5. Connect the case and inspect the build
Use the motherboard’s front-panel diagram for the power switch, reset switch and indicator LEDs. The LED connectors have polarity; the simple power-switch connector generally does not. Connect front USB and audio to their labelled headers without forcing the keyed connectors. Connect case fans to suitable headers or a powered hub without exceeding the header’s rated load.
- Confirm the CPU cooler is secure and plugged in.
- Check that RAM and the graphics card are fully seated.
- Make sure no loose screw remains inside the case.
- Keep cables away from fan blades and close the panels without crushing a power cable.
- Connect the monitor to the graphics card when using a dedicated GPU. A motherboard video port requires supported integrated graphics.
6. Start the PC and install the operating system
Connect mains power, switch the PSU on and press the case power button. A new platform can take longer than expected to train its memory; follow the motherboard’s guidance before interrupting it. Enter the firmware setup using the key shown by your board. Check that the CPU, expected memory capacity and storage appear. Watch CPU temperature: a rapid unexplained rise or thermal shutdown means you should turn it off and inspect the cooler.
Start with firmware defaults. Establish that the machine works before enabling XMP or EXPO memory profiles, which are overclocking settings and are not guaranteed on every combination. If a firmware update is necessary, use the exact board model and revision’s file and follow the manufacturer’s process without interrupting power.
Boot the official operating-system installer. On a fresh build, disconnect unrelated storage before installation if practical so you cannot erase the wrong drive. Check Windows 11 hardware requirements if that is your chosen OS. Install official chipset, graphics and network drivers, apply updates and test your normal workload before making further changes. If there is no picture, use our first-boot troubleshooting guide.
References and further reading
Use these manufacturer resources alongside the manuals for your specific parts. This is an educational guide, not a hands-on product review or benchmark.
Spotted an error? Send a correction with the page link and your hardware model. Read our editorial policy.